
The Photobooth

A photo booth holds this nostalgia even in a world where everyone has a high resolution camera in their pocket capable of 16MP photos, people are still amused by a photobooth. It's just, awesome!
We wanted to capture that feeling at our wedding and provide guests with a cool and fun way to leave memories and take something home with them at the end of the night. We looked around but everything was costly and bland looking, so I set off with the plan to make one and this a is blog post on how it started.
The build
I took an older HP Pavilion laptop with a touch screen that was donated to me and completely stripped it apart. This was a great machine to its owner and it is a perfect machine for this build with quad core processor and 8 GB of DDR3.

I was given an old brief case from my sister who has an eye for old unique pieces and it just so happens it will fit the screen!
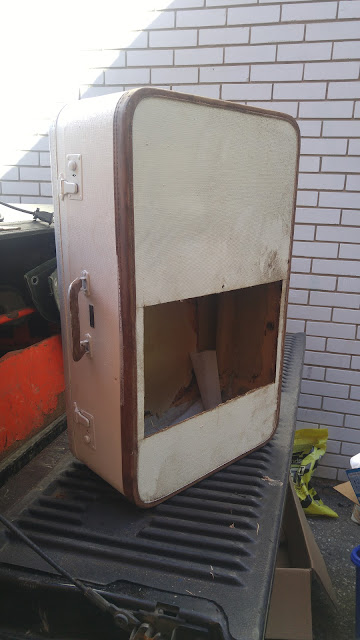
To mount the screen I made a rough frame out of wood glued inside the case. I then used a double side adhesive and later secured it with aluminum duct tape as well.
I had a few comments about "taping" the screen into place and although I wasn't very keen on it either, it really is how cellphones and tablets are held together and hasn't been an issue yet.

Once the screen was in place and the laptop apart, I made a frame out of as scrap wood and aluminum with standouts to mount the motherboard to a frame. I then made use of the 2.5 inch drive tray that was in the laptop and fastened it the side with some wood screws.

The 2x6 wood I had was helpful in giving support for the brief case while providing beefy material to attach the mount for the tripod stand.

I searched for software that would provide the functionality I was looking for while providing the best user experience and found that in a very affordable application called Instant Photobooth.
Instant Photobooth was very simple to setup with a ton of cool features. I ended up using it with a feature in Windows with call Kiosk mode. Basically, when the photobooth is fired up it boots straight into a user account that is restricted to launching anything but Instant Photobooth.
At this point it looked great, had character but needed a camera and some finishing touches.
I hummed and hawed about what camera to install. There are a lot of great cameras with a very nice Sony lense supported by the software, however budget was still a concern. I ended up settling with the quality and autobalancing features of a Logitech web cam and mounted it the same way as the screen.
The face of it still needed a special touch, so I cut a picture frame I found at a local crafts store to frame it off with drapes on the side the same colour as the original software background.
To throw off where the lense was, I added two rubbies from the dollar as a final touch.

Once we started playing with it, we decided it needed a printer. I purchased a Cannon Selphy cp1200 for 119 bucks, made a mount and cut hole in the side of the case. I was very impressed by the quality and print time accomplished with this printer, approximately 45 - 60 seconds in total.


I have been very pleased with the outcome of project and it has received very positive feed back everywhere it's been so far. While at this point has full functionality, I have a few ideas to make improvements in the near future.
Comments
Post a Comment